DryFire Simulator & Room Setup Instructions
Step-by-step guides & documentation
DryFire Room Setup Instructions
DryFire Room Setup
Follow the steps below to get started!
The DryFire software will guide you through customizing your room and fine-tuning your simulator for your needs.
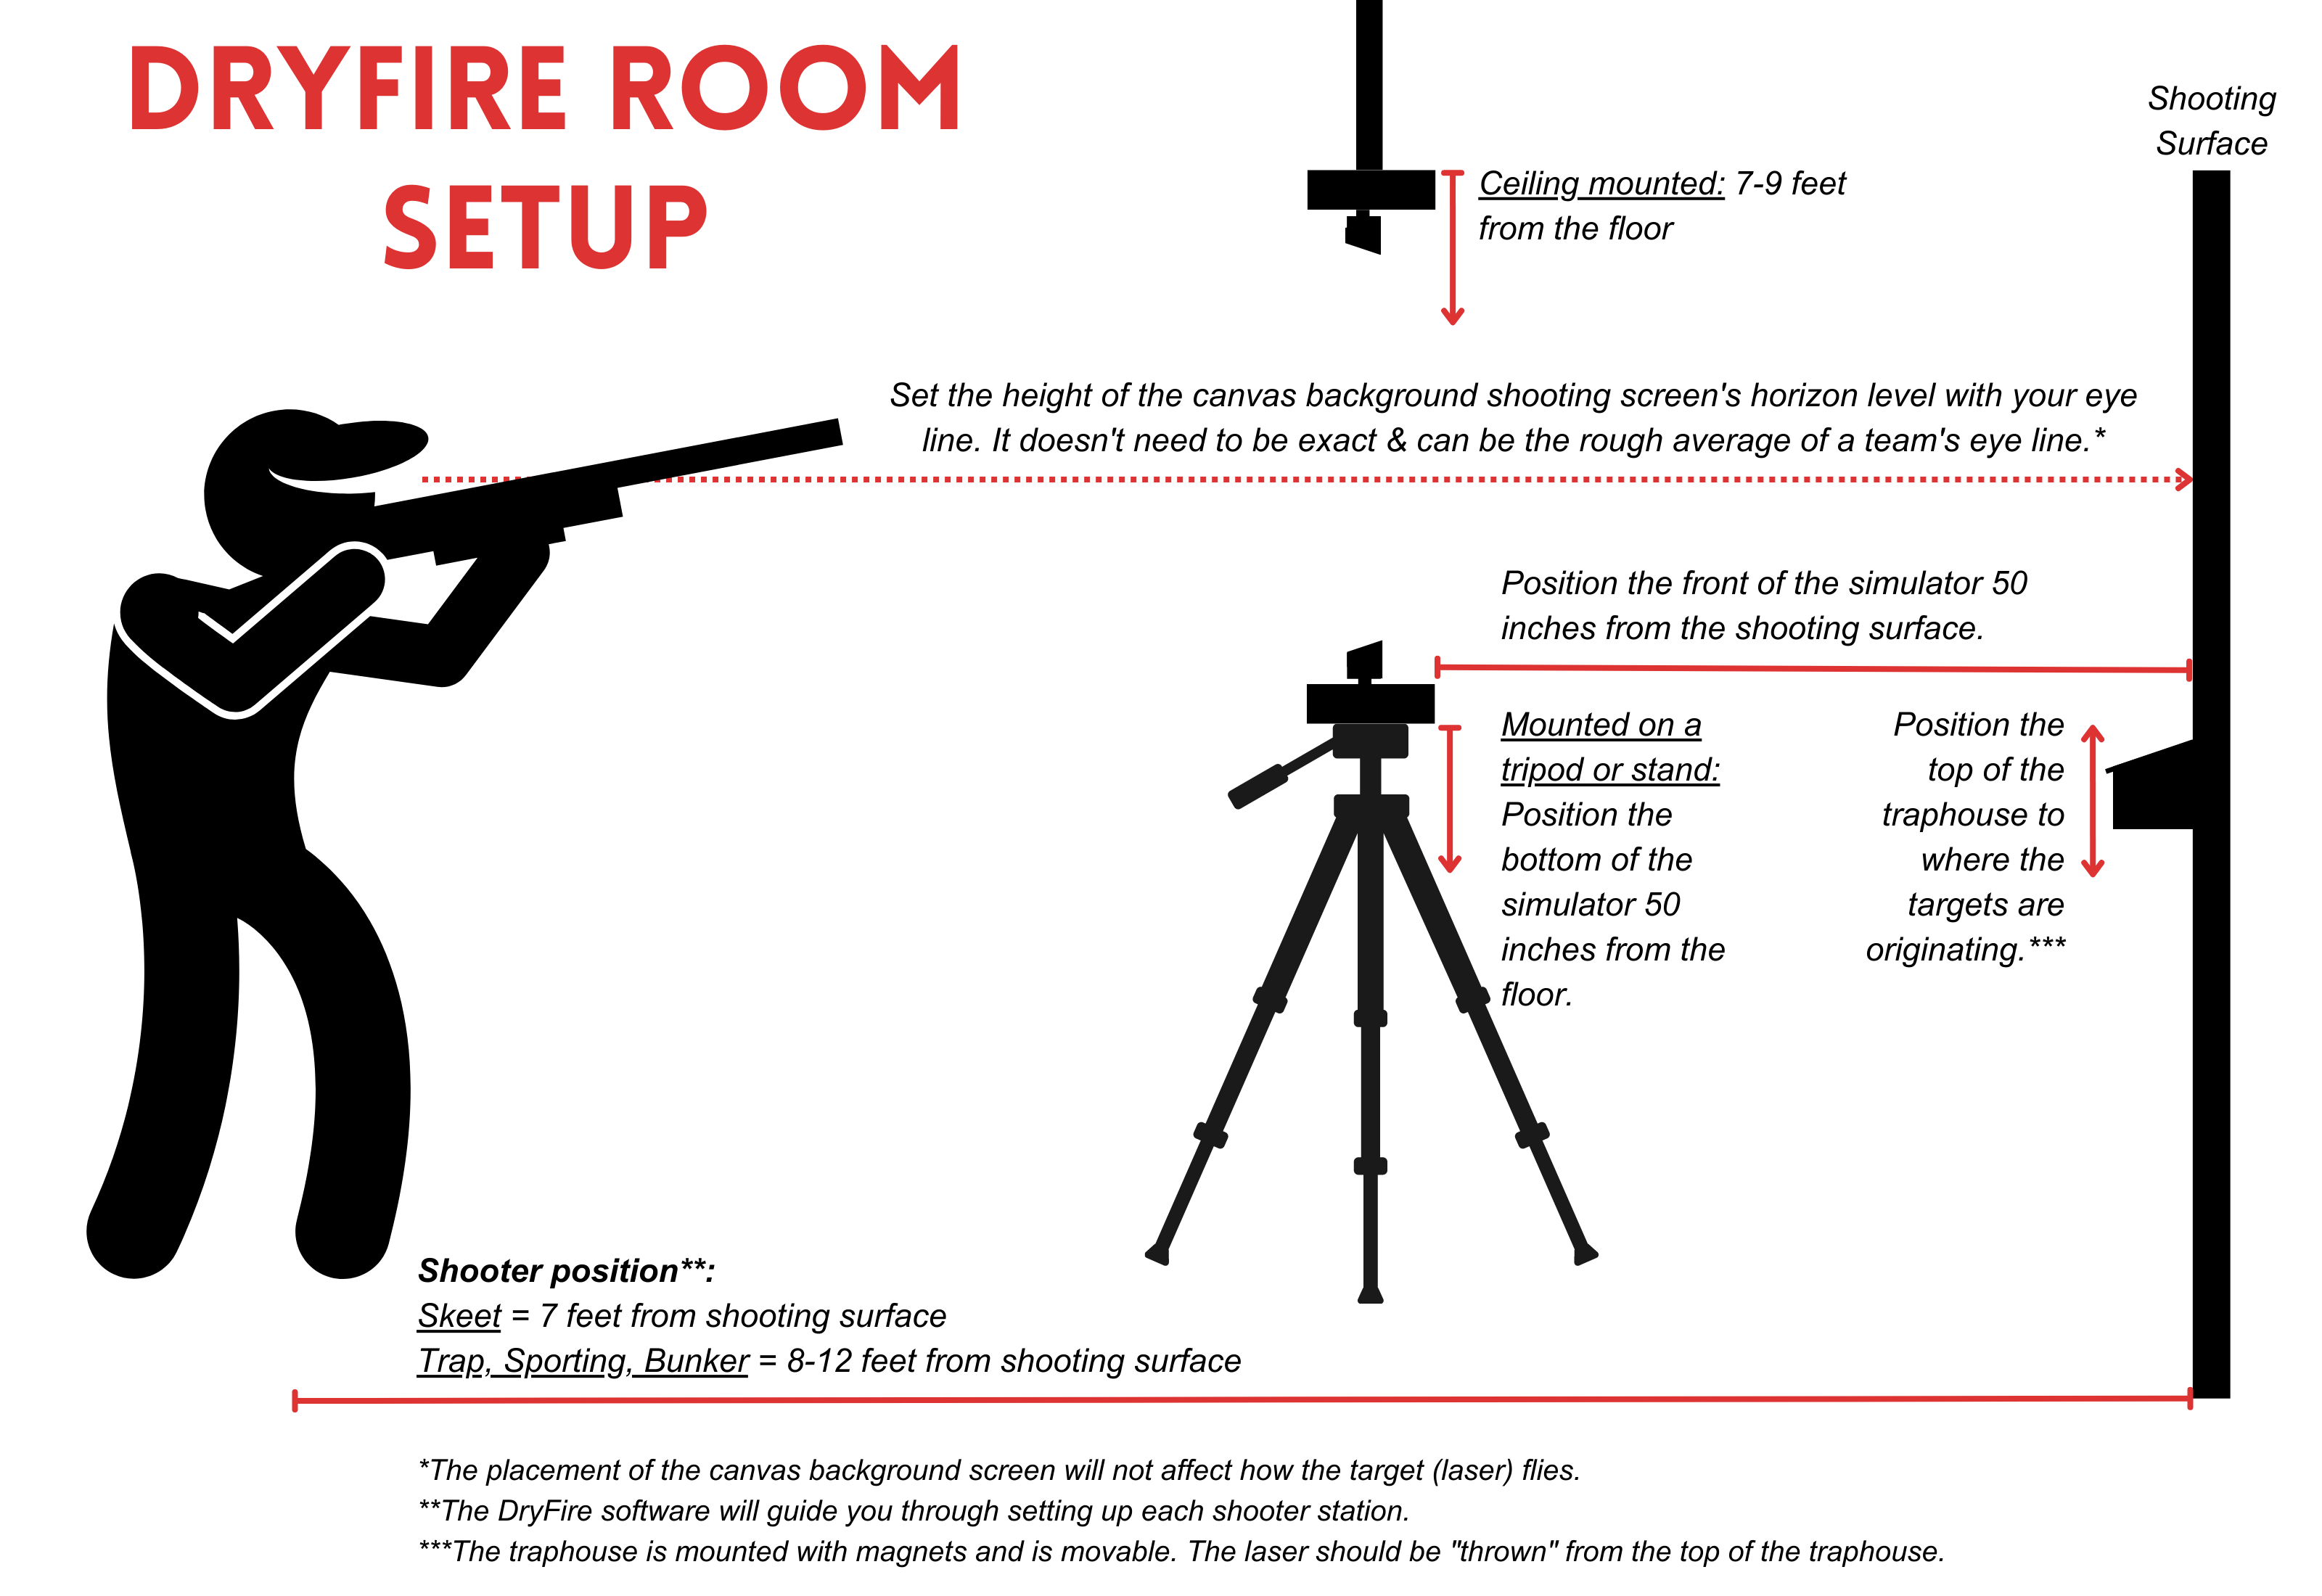
1. Simulator Position in the Room:
Tripod or Stand ("50x50"): Position your DryFire Simulator 50 inches from the wall and 50 inches from the floor (if on a tripod or stand). This can vary by several inches in any direction. You will input your measurement into the software to finalize your setup!
Ceiling Mounting: If you're mounting the DryFire Simulator from the ceiling, position it 7-9 feet from the floor. You'll input the exact position in the DryFire software.
Hint: Position the simulator at the horizontal center of the shooting surface so that all targets stay on the DryFire Background Shooting Screen. See instructions for setting up a DryFire Background Shooting Screen. The placement of the canvas background screen will not affect how the target (laser) flies.
2. Shooter Position in the Room:
Trap, Sporting, Bunker: 8-12 feet from the shooting surface
Skeet: 7 feet from the shooting surface
Pro Tip: During the setup process, the DryFire software will guide you through setting up each shooter station!
Simulator Setup Instructions
QUICK START GUIDE
1. Insert the Installation Flash Drive into a USB port on your computer.
2. Install DryFire software, found in Folder F99. (File DFV410200.exe)
3. Connect your DryFire unit to your computer (cable included).
4. Watch videos 02-07 below.

DryFire Setup Instructional Videos
DryFire Setup Instructional Videos